table of contents
1. What you'll notice when you search for "How to become a guitarist"
If you search for "how to become a guitarist," you'll notice something interesting. While there are many articles explaining "how bands find guitarists," there are surprisingly few articles written from the perspective of "someone who wants to become a guitarist themselves." Our blog has previously published a complete guide on how to find a guitarist when you can't find one , but that was an article from the perspective of "how bands find guitarists." This article, however, is written from the other side—from your own perspective, "I want to start playing guitar and be able to play in a band."
This pattern of shifting perspectives is something I've covered in previous articles on how to become a keyboardist , a drummer , and a bassist . I believe that information about instruments and bands only comes full circle when both articles from the recruiting side and articles from the aspiring musician's side are present. The guitar, in particular, occupies a unique position as "the most people start playing, but also the most people who give up." You can learn to strum chords in a few days, but the distance to being recognized as a "guitarist who can play in a band" is actually just as long as with other instruments. In this article, I will explain as concretely as possible a roadmap for complete beginners to start learning guitar on their own, and how to determine "at what level you can play in a band."
Membo , the service we operate, allows you to search across multiple Japanese band member recruitment websites. When you look at the recruitment conditions posted there, you'll notice that there are surprisingly many phrases like "Guitar experience welcome" and "Beginners welcome, if you can play chords, that's OK." In other words, once you've followed the roadmap outlined in this article, there are far more entry points available to you than you might imagine.
First of all, the term "guitarist" encompasses more than one role within a band. Broadly speaking, there are two main roles: lead guitar and rhythm guitar . The lead guitarist is responsible for weaving the melody line with single notes (playing only one string), such as short phrases between verses and choruses, or guitar solos during instrumental breaks. The rhythm guitarist, on the other hand, plays chords to create the rhythm and provides the "foundation of harmony" that fills the gap between the vocals and the drums and bass. Their main job is to support the backing with 8-beat strokes and cutting, and they don't often play single-note phrases. In actual bands, if there are two guitarists, these roles are clearly defined, but in bands with only one guitarist, it's not uncommon for one person to switch between both roles depending on the situation, such as playing rhythm in verses and choruses and taking on lead during instrumental breaks. The roadmap presented in this article is structured to first develop the skills necessary to be a competent rhythm guitarist, and then gradually add lead elements from there.
2. Which should I start with, acoustic or electric guitar?
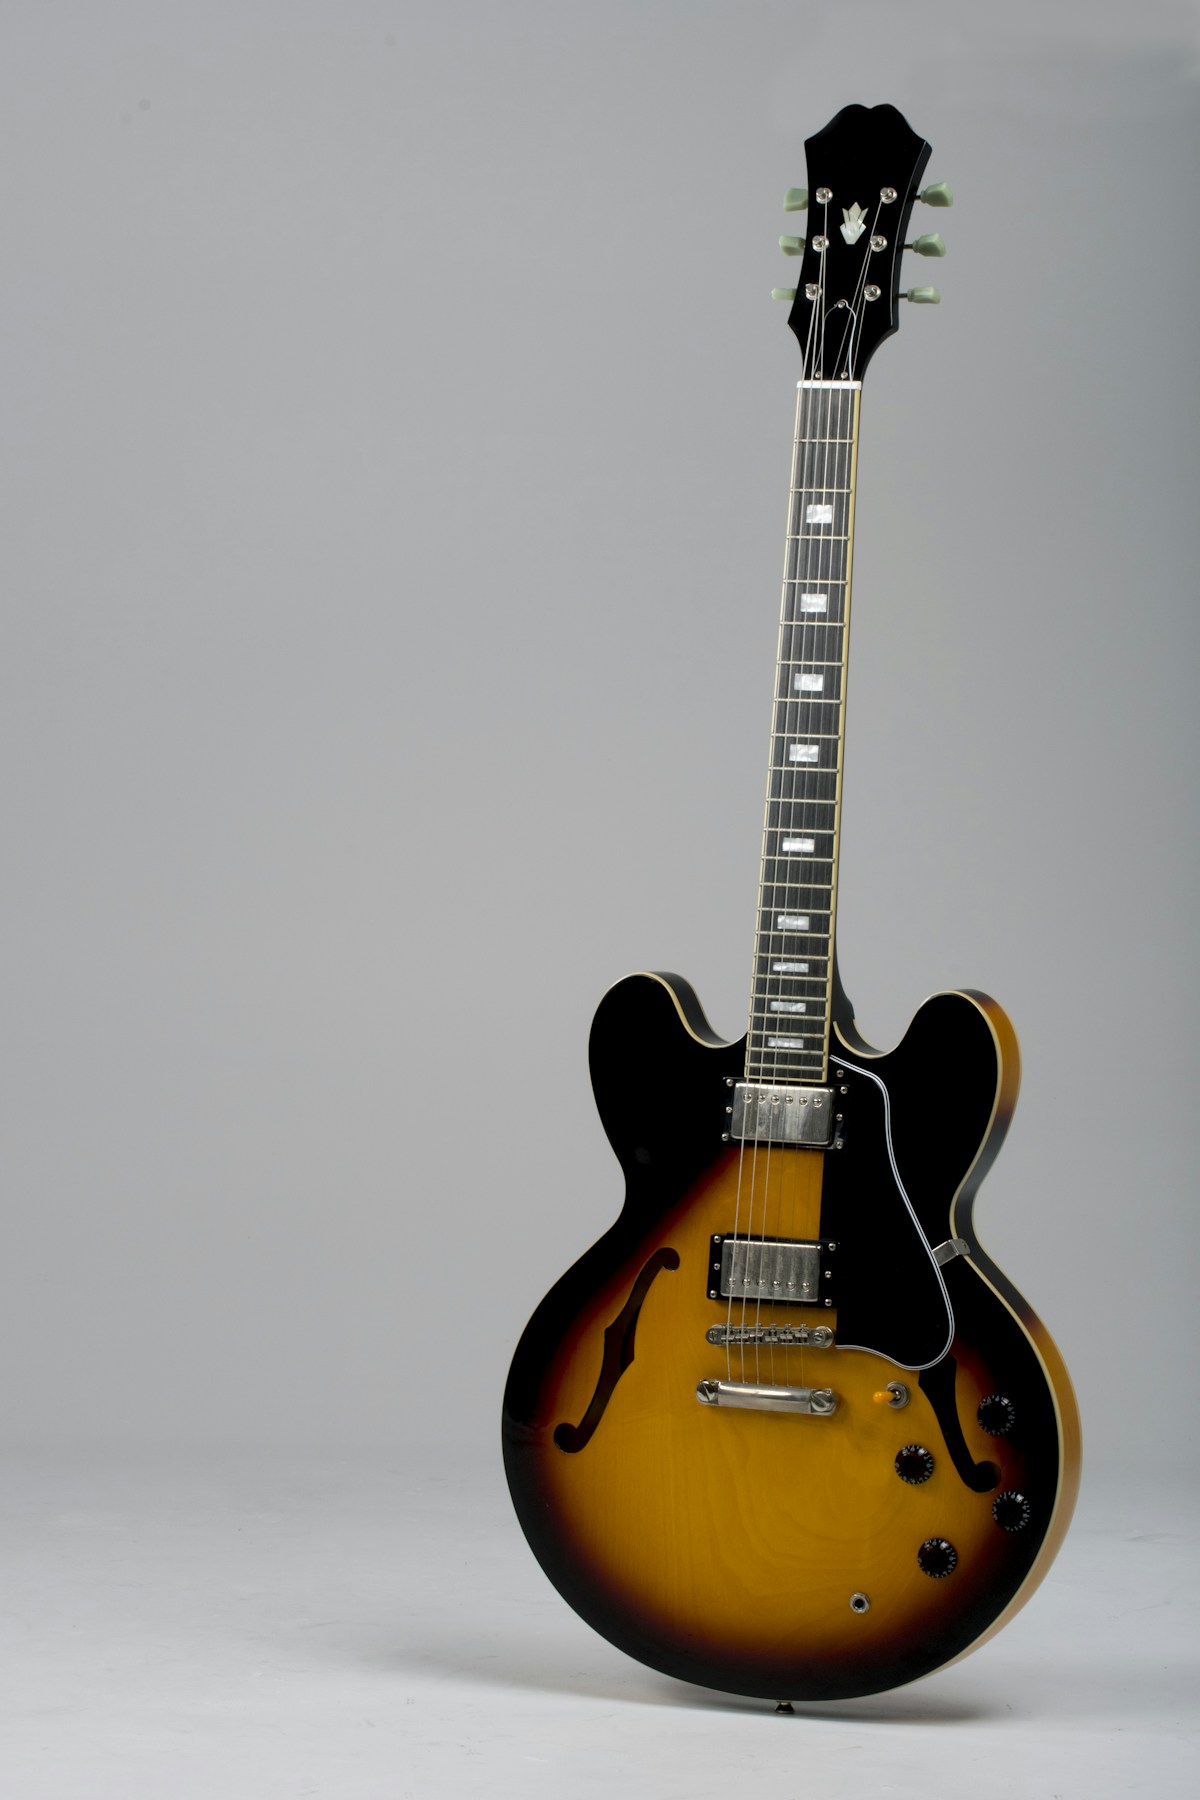
An electric guitar is a guitar that has a built-in pickup that converts the vibration of the strings into an electrical signal to produce sound, and the sound is amplified. On the other hand, an acoustic guitar does not require electrical amplification and is an instrument that produces sound only through the vibration of the strings and the hollow body. In Japan, it is also known by the abbreviation "acogi," and after the folk boom of the 1960s and the popularity of MTV Unplugged in the 1990s, it has become widely played in settings other than bands. If your only goal is to "form a band," you will eventually go down both paths, but choosing which one to buy as your first guitar is a point where many beginners stumble.
| musical instrument | Features | Suitability as a first bottle |
|---|---|---|
| Acoustic guitar | No power supply or amplifier required; the strings are thicker, making tuning easier. | Suitable for those who want to start easily. Fingertips are prone to pain. |
| Electric guitar | An amplifier is required, but the strings are thin and easy to press, and there is a wide range of tonal possibilities. | Suitable for those who want to focus on a band sound from the start. A full set of equipment is required. |
To put it simply, if your goal is to eventually play in a band, I recommend starting with an electric guitar. The reason is simple: the strings are thinner and the string height is easier to adjust, reducing the strain on your left hand when pressing down chords, making it less likely to give up. On the other hand, if you want to start with casual singing and playing, or if you don't have space for an amplifier, starting with an acoustic guitar is perfectly fine. The way you hold down chords and the basic theory are the same regardless of which you start with, so it's entirely possible to switch to the other later. The important thing is not to keep worrying about which is the right choice, but to pick one up and start playing as soon as possible.
When choosing an electric guitar, two models that beginners often consider first are the Fender Stratocaster and the Gibson Les Paul . The Stratocaster, released in 1954, features three single-coil pickups and became an iconic rock guitar after being played by Jimi Hendrix. The Les Paul, released in 1952, is characterized by its thick, sustained sound thanks to its humbucker pickups and has been a favorite of guitarists such as Eric Clapton and Jimmy Page. Both are long-selling models that have been around for over 70 years, so it's a good idea to actually check the price range, weight, and neck thickness at a music store and choose one that fits your hand. Beginner-friendly starter sets (including the guitar, a small amplifier, a cable, and a tuner) can be purchased for around 20,000 to 40,000 yen. To give specific model names, the Squier by Fender series (starting from around 25,000 yen for the guitar body only) and the Yamaha PACIFICA series (such as the PAC112V, starting from around 40,000 yen for the guitar body only), which are well-known entry-level models, are often mentioned as "a beginner's first guitar" in music stores. If you're unsure about your budget, it's a good idea to actually pick up these two series and compare their weight and string height.

3. Which should you choose: self-study or music lessons (school)?
When starting to learn guitar, many people first struggle with the decision of whether to learn on their own or to attend a music school from the beginning. Both options have clear advantages and disadvantages, so it's important to choose the one that best suits your personality and lifestyle.
| Comparison items | Self-study | Music lessons (school and private lessons) |
|---|---|---|
| Estimated cost | Only textbook and app usage fees are required (approximately several hundred to several thousand yen per month). | The typical monthly fee is around 6,000 to 15,000 yen. |
| pace | You can proceed at your own pace and at your own time. | You need to attend on a fixed day and time. |
| Accuracy of form | It's easy to forget your habits and for them to become ingrained in your own way. | The instructor will correct your posture and finger angles on the spot. |
| Ease of continuation | Maintaining motivation is your own responsibility, and the dropout rate is high. | The mere fact that you plan to attend will encourage you to continue. |
| Suitable people | For those who want to proceed at their own pace, or those who want to try it out at a low cost first. | For those who want to improve in the shortest time possible, and those who are unsure about their form. |
The self-study roadmap presented in this article is based on the premise that many people will actually follow: "I'll start by studying on my own." However, self-study and music lessons are not necessarily mutually exclusive. A realistic option that can be effective while keeping costs down is to "learn the basics using self-study apps and instruction books, and only take single lessons when you feel insecure about your form." The three-stage roadmap presented in the following sections is for those who have chosen this "start with self-study" path.
4. Code Learning Roadmap Step 1 | Open Chords and Downstrokes
When learning guitar on your own, the first hurdle is "playing open chords (basic chords that include open strings) and strumming them in time with the rhythm." Basic chords like C, G, D, Em, and Am are versatile chords that can cover many pop songs sung in Japanese. At first, you'll hit a wall where your left-hand fingers can't spread wide enough to hold down the chords, causing the strings to buzz and producing a clean sound, but this is a stage that almost everyone goes through.
The following order is recommended for a specific procedure:
- First, practice slowly switching between the two chords, C and G : Do not attempt any other chords, and repeat until you can switch between these two chords smoothly.
- Set the metronome to around 60-70 BPM and keep the rhythm using only downstrokes (striking downwards) : Prioritize making a sound without the strings buzzing over speed.
- Gradually increase the types of chords you can play : C → G → D → Em → Am, expanding your range of playable chords step by step.
- Try copying the chord progression of a simple song : Choose a song with few chords, like those introduced in the guide on how to choose easy songs to play during your first band practice, and put it into practice.
- Mix downstrokes with upstrokes (strumming upwards) : Try out a basic 8-beat strumming pattern.
The metronome , originally conceived by Dutch inventor Dietrich Nikolaus Winkel, was patented and popularized in 1816 by German inventor Johann Nepomuk Maelzel. For over 200 years, it has supported musicians in keeping tempo. Beethoven, a friend of Maelzel's, is said to have been one of the first to adopt this instrument. A reasonable practice period is approximately 1-2 months if you consistently practice for 20-30 minutes a day. Step 1 is a signal that you can move on to the next stage when you progress from a state where there is a time lag between pressing a chord and the sound being produced to being able to change chord positions in time with the rhythm. Using a capo has the advantage of allowing you to change the key of a song while keeping the same chord form, so you can practice in a key that is easy to sing without increasing the number of chords.
5. Chord Learning Roadmap Step 2 | Barre Chords and Cutting
Once you've mastered open chord strumming, the next hurdles are barre chords (chords where you press down on multiple strings simultaneously with your index finger) and cutting (a crisp, rhythmic cutting technique). Barre chords like F, Bm, and B♭ are known to be the first stumbling blocks for many beginners. Everyone goes through a period where they can't get the hang of applying even pressure to press down on all six strings with their index finger, resulting in muffled sounds.
For practice, it's effective to start by barring just one string to check if it sounds properly, and then gradually increase the number of strings you're pressing down to two, then three. Trying to play the complete F chord all at once is likely to lead to frustration, so prioritize getting your fingers used to the correct pressure. At the same time, you should also work on "cutting," which uses muting. This technique involves lightly touching the strings with your left hand to stop the sound while playing a crisp rhythm with your right hand, and is frequently used in funk and pop backing. The sense of timing the cutting to the rhythm of the drum hi-hat is something that can only be honed through practical band practice, like the kind introduced in the first band practice roadmap . As a guideline, after completing Step 1, you should aim to practice for another 1-2 months until you can play both barre chords and cutting without major problems. It's recommended to prioritize stabilizing your barre chords first, rather than trying to master both at the same time.
A common misconception when playing barre chords is that you should "crush the strings with your grip strength." In reality, the key is to use the side of your index finger rather than the pad, and to slightly lay your finger flat to make even contact with all six strings. Furthermore, placing your thumb around the center of the back of the neck and lightly gripping the neck with your entire fingers will prevent you from relying on grip strength alone. Another tip is the angle of the neck. If you don't hold the guitar too upright and tilt the neck slightly downward, the force on the pad of your index finger will be more evenly distributed. If you are unsure whether your form is correct, make it a habit to slowly strum each note to check for any blocked strings; this will help you quickly break free from brute force.

6. Chord Learning Roadmap Step 3 | Developing Scales and Improvisation
Once you've mastered barre chords and strumming, and can play through a simple backing track, it's time for the final big step towards reaching a "band-ready level"—developing into solos and improvisation using scales. By repeatedly practicing tracing basic scales, including the pentatonic scale, on the fretboard in time with chord progressions, you'll be able to create phrases that go beyond simply playing chords.
To give you a concrete image, let me explain the positional relationships on the fretboard in words. The minor pentatonic scale is composed of moving back and forth between two adjacent frets (two positions with a one-fret gap between them) on each of the six strings. Its characteristic is its ease of use; once you learn just one position (the same area on the fretboard), you can use it almost anywhere in a song in that key. For your first improvisation, simply holding down notes that fit the chord progression is enough to sound good. Once you get used to it, try simple combinations such as lowering the note you were holding down by a semitone or a whole tone to the next note, or playing the same note repeatedly in short bursts before moving up or down one note. There's no need to aim for difficult phrases from the start; simply "playing notes that fit the chord that's currently being played, varying the length in time with the rhythm" is enough to sound like a solo.
Especially if you play electric guitar, your interest will likely expand to include sound shaping with effects pedals and amplifiers at this stage. Knowing the common types of effects pedals, such as distortion (overdrive, distortion), spatial effects (reverb, delay), and modulation effects (chorus, flanger), will make it easier to describe the sound you're aiming for. However, there's absolutely no need to acquire multiple effects pedals in the early stages of self-study. Initially, you can practice sufficiently with just the distortion channel built into your amplifier, and you can gradually add more equipment once you can play chords and scales to a certain extent. As a guideline, if you continue practicing for another 2-4 months after completing Step 2, you'll often feel confident enough to keep up with your first band practice without falling too far behind. Refer to tips for making band practice more efficient and proceed through this stage without rushing.
7. Securing a Practice Environment | Volume Issues and Amplifier/Effects Pedal Selection for Home Practice
When learning guitar on your own, one issue you'll inevitably face, just like with any other instrument, is volume. Playing an electric guitar amp at full volume can easily lead to neighborly disputes, not only in apartment buildings but even in detached houses. Many self-learners practice the basics at home using a small amp with a headphone jack or a multi-effects pedal, and supplement their experience playing in a real band setting by renting a practice studio . With acoustic guitars, the raw sound itself resonates, but you can avoid neighborly disputes by being considerate, such as plucking the strings less hard when practicing late at night or early in the morning, or by using a soundproofing mat.
For home practice, you can choose from a wide range of equipment, from mini headphone amplifiers that cost a few thousand yen to multi-effects units with built-in effects (models that combine amp simulators, tuners, and rhythm machines into one unit) costing around 10,000 yen. If your budget allows, choosing the latter is a win-win situation, as you can practice sound creation at the same time. As for soundproofing measures other than equipment, practical ideas include laying soundproofing mats or thick rugs on the floor to reduce the transmission of vibrations, avoiding early mornings and late nights to be considerate of neighbors when practicing, and increasing the proportion of headphone practice.

Our guide to renting practice studios explains in detail how to make reservations and use the equipment when using a studio for the first time, but we'll just touch on the key points here. Small practice rooms for individual use generally cost around 500 to 1,500 yen per hour, regardless of whether you're in an urban or rural area, and many studios offer discounts if you show your student ID. Guitar amplifiers are usually provided, so one of the advantages of using a studio is that you can practice empty-handed, as long as you bring your guitar and cable. If you've already formed a band, it's a good idea to combine individual practice and band practice in a balanced way, referring to tips for making band practice more efficient. Even if you haven't formed a band yet, browsing bands that welcome experienced guitarists on Membo can help you get a concrete idea of what level you should aim for.
8. How to choose practice apps and materials for self-study
In recent years, there are many learning materials available to support self-study, such as practice apps for smartphones and tablets, performance tutorial channels on YouTube, and instructional books available in bookstores. Many guitar practice apps are equipped with features such as chord diagram display and tuning/chord detection that uses a microphone to determine the correctness of your playing. By actively utilizing these features, you can move beyond the vague feeling of "I think I can play somehow" and proceed with your practice based on objective indicators.
| Types of teaching materials | Features | Suitable people |
|---|---|---|
| Code detection apps (e.g., Yousician) | The system uses a microphone to listen to the performance and determines the chord fingerings in real time. | People who want to check their own correct form |
| Tablature app (e.g., Ultimate Guitar) | Displays chord charts and tablature for commercially available songs, and supports key changes and slow playback. | People who want to copy and practice their favorite songs |
| Video explanation channel | From basic form to solo setup, there are plenty of free tutorial videos available. | People who want to keep costs down, people who want to learn visually |
| Instructional books and scores | Basic patterns and chord progressions for different genres are systematically compiled. | People who want to take their time and build a solid foundation from the ground up |
While these materials are excellent for learning basic forms and chords, they don't teach you the sense of rhythm and listening to other parts in a band setting. Think of these materials as merely tools to improve the efficiency of basic practice, and once you feel you've made some progress, it's best to quickly move on to jam sessions and actual band practice. Ultimately, the skills needed to succeed in a band can only be honed through experience playing with real people.
9. The limitations of self-study and when to consider school lessons.
Self-study has its limitations. Especially with guitar, it's difficult to notice bad habits in your form, and continuing to play incorrectly can lead to wrist and finger pain. If you notice any of the following signs, it might be time to consider taking a single lesson or attending a school.
- No matter how much I practice, I can't get the rhythm right when it comes to certain chord changes.
- I started to feel pain and discomfort in the hand that presses down on the strings and in the wrist that picks.
- I can no longer judge what's wrong with my playing just by using video tutorials.
- I've lost sight of my goal and don't know what to practice next.
Music schools and private lessons offer a significant advantage over self-study: the ability to have your form objectively checked. As mentioned in the comparison table in Section 3, online lessons are often available from a few thousand yen to around 10,000 yen per month, offering the convenience of taking lessons from home and allowing those living in rural areas to receive instruction from instructors in urban areas. However, a drawback is that it's difficult to convey the finer details of form through a screen. In-person lessons typically cost around 10,000 yen per month, which is generally more expensive than online lessons. However, the major advantage is that you can have your posture, finger angles, and how you apply force directly checked and corrected on the spot. You don't need to rely entirely on schools; a combination of self-study for the basics and lessons for form checks can be quite effective. Instead of forcing yourself to stick to one method, choosing methods that suit your own progress, even if it seems like a roundabout way, is actually the shortest path to success. While continuing lessons, simultaneously searching for session partners or bands on Membo is one way to maintain motivation.
10. Learn from world-renowned guitarists from Japan and around the world.
When you get lost while continuing to learn on your own, the paths of guitarists who have actually been active in bands can be a great source of inspiration. Here, we introduce some real-life performers whose careers can be verified.
In Japan, Tomoyasu Hotei is one of the leading examples. He formed the rock band BOØWY in 1980 and debuted in 1982. He is known for his unique style of playing the guitar with geometric patterns and is also famous for composing the theme song for the "Kill Bill" movie series. Another example is fusion rock guitarist Masayoshi Takanaka . He made his professional debut in 1971 while still in high school and was also active as a member of the Sadistic Mika Band. His hit song "BLUE LAGOON" from 1979 remains popular to this day.

Looking overseas, Jimi Hendrix greatly expanded the possibilities of rock guitar with his innovative playing style that made extensive use of feedback and effects, and is considered one of the most influential guitarists of all time. His legendary performances at the Monterey Pop Festival in 1967 and Woodstock in 1969 are still talked about today. Another is Eric Clapton , who, through bands such as The Yardbirds, Cream, and Derek and the Dominos, has etched his name in rock history with his blues-based guitar playing. What they have in common is their attitude of not staying within existing frameworks, but uniquely pioneering the role of their instrument within the band structure.
11. 7 Checklist Items to Determine "Band-Ready Level"
Many people who continue to learn on their own worry whether they are ready to join a band. There is absolutely no need to aim for perfection, but try using the following seven items as a checklist as a guideline.
- Even with the metronome turned off, does the rhythm of the strokes remain consistent throughout the entire song, without significantly speeding up or slowing down?
- If you're given a chord progression, can you keep up without getting stuck on the finger changes?
- Do you consciously try to match your cutting and strumming to the rhythm of the drums and bass?
- Can you play a song from beginning to end without stopping?
- Can you continue to support the rhythm without panicking, even if the vocals or other parts falter a little?
- Can you communicate your requests regarding volume balance and effects in concise language?
- Can we create a song in a rehearsal format after just a few sessions, even with members we've just met?
You don't need to meet all the requirements. In fact, these are skills you can develop after joining a band. By referring to the guide on how to rent a practice studio and gaining experience playing with a band in a studio, you will naturally acquire many of these skills. What's important is not waiting until you can play perfectly, but having the courage to take the plunge once you can do about half of the seven requirements.
I've spoken to many band members, and I've found that most bands looking for a guitarist aren't necessarily looking for someone with exceptional technical skills from the start. What I've heard far more often is, "We just want someone who can help us create the band's sound, even if they can only play basic chords and rhythm guitar." This 7-item checklist isn't meant to measure perfection, but rather to be a map to help you understand where you stand right now.
12. Common points of frustration and how to overcome them
The guitar is known as an instrument that "many people start playing, but many also give up on." According to a 2018 survey published by major guitar manufacturer Fender, more than 90% of people who buy their first guitar stop practicing within 12 months, and many stop within the first 90 days. The Step 1 to Step 3 roadmap introduced so far is actually based on the premise that most people stumble at this "first hurdle." Conversely, if you can overcome this hurdle, you will have already taken a step ahead of most self-learners. There are several typical points where people give up when learning guitar on their own. Here, we will introduce some of the most common ones and how to overcome them.
① I get discouraged when I hit a wall with barre chords.
Many people get discouraged by barre chords like the F chord, and it's actually one of the top reasons why people quit playing guitar. This isn't unusual; it's a stage that many guitarists go through. The key to success is to re-examine your form rather than trying to force the chords down by gradually increasing the number of chords you play, changing the angle of your fingers, or slightly shifting the position of your fingers.
② Finger pain, unstable form
When you first start pressing down on the strings, your fingertips are likely to hurt, and your form won't be stable. Don't rush, prioritize practicing every day, even for short periods, and it's important to rest if the pain is severe. Referring to a beginner's guide to joining a band and joining an actual practice session early on can also give you an opportunity to objectively review your form.
③ A period of stagnation where progress feels stagnant
Even the most self-taught musicians will experience a plateau where they don't feel like they're improving despite practicing. At times like these, changing your perspective—such as altering your practice routine, recording your playing to gain an objective perspective, or even taking a lesson—can be the key to breaking through. A plateau isn't a sign of stagnant growth; it's often a period of preparation for future progress.
④ I feel like my fingers just don't move the way I want them to, and that I'm not suited for it.
Even after practicing all the exercises described so far, some people still struggle to maintain stable finger separation and form, and find the practice itself painful. In such cases, there's no need to stubbornly stick to just the guitar. Guitar isn't the only part needed in a band; keyboards allow you to play chords with just one finger, drums are easy to learn on your own and allow you to develop a sense of rhythm, and bass is easy to start with because it involves fewer strings to press simultaneously and focuses on single notes. Each instrument has completely different points of frustration and requires different body mechanics. It's absolutely not true that "not being able to play the guitar means you're not suited for a band," and switching to a part that suits your hand movements and feel is a rational choice, not a detour. In fact, many people continue to be in bands for a long time while switching parts, such as from drums to guitar, or from bass to keyboard.
13. Taking a step beyond self-study | Joining a studio session band
Once you've followed a certain roadmap, it's time to dive into the real world. For anxieties and guidance on joining a band for the first time, our beginner's guide to joining a band explains everything in detail. If you're joining an existing band midway through, refer to our guide on writing a self-introduction to explain specifically what kind of practice you've done and what kind of songs you can play, which will put the band at ease. If you want to form a band from scratch, we recommend starting with our guide on how to start a cover band and gradually working your way up to creating original songs .
If you're struggling to write a self-introduction as a guitarist, the following approach might be helpful.
- For a self-taught beginner : "I've been playing guitar for X months, and I'm practicing open chords and strumming on my own. I can now play through simple songs with backing tracks. I'm still inexperienced, but I want to keep practicing and expand my capabilities."
- If you have made some progress through self-study : "I have been playing guitar on my own for about X years, and I can handle backing and cutting techniques, including barre chords, to a certain extent. I am also trying my hand at simple improvisation and can handle sight-reading cover songs to some extent. I would love to participate, even if it's just for practice once or twice a month."
Rather than listing your perfect playing skills, being honest about "what level you're at now and how often you can practice" will be more reassuring for the band. Once the band is established, you might want to look into ways to promote your activities and announce live shows on social media .
Guitar is one of the most sought-after parts in a band, which is why those who can go beyond simply "being able to play chords" are highly valued. When you read articles about how to find a drummer or how to become a bassist , you'll see that similar struggles exist for those "looking for" and "becoming" other parts as well. Using a band member recruitment service like Membo , you can find a band that matches your skill level and desired musical style on a nationwide scale.
14. How foreign guitarists can enter the Japanese band scene
It's not uncommon for foreign musicians who can play guitar to join Japanese bands. However, they often struggle with communication in Japanese and the studio booking system. This article introduces practical tips for finding band members, overcoming language barriers when foreigners and Japanese people form a band . For foreign musicians who want to start a band while living in Japan, please also refer to the Complete Guide to Forming a Band in Japan (Practical Edition for Foreign Musicians) .
Membo 's commitment to supporting eive languages stems from its desire to lower language barriers as much as possible. Even if you're not familiar with Japanese studio booking or band terminology, being able to check recruitment information in your native language and start communicating with translated text significantly lowers the barrier to participating in the Japanese band scene. No matter where you live in Japan, using Membo , which supports all 47 prefectures , expands your chances of finding bands looking for guitarists. If you want to learn more about the Japanese music scene itself, you can also refer to "What is the Music Scene? A Complete Guide to the Japanese Band Scene Map and How to Get In ." If you're still unsure about which instrument to choose, we recommend starting with our guide on choosing an instrument based on personality and lifestyle . For those exploring the path of "joining a band" from other instruments, our guides for violinists and string players , and the complete guide on how to find bassists and drummers when you can't find them , should be helpful in terms of perspective.
15. Summary | From "playing" to "making sounds"
This article directly addresses the search intent of "How to become a guitarist," discussing the initial fork in the road—whether to start with acoustic or electric guitar, and whether to choose self-study or music lessons—and presenting a self-study roadmap: three steps—open chords and downstrokes, barre chords and cutting, and the development of scales and improvisation—along with a seven-item checklist to determine if you're at a level where you can play in a band. We also looked at the paths of real-life guitarists such as Tomoyasu Hotei, Masayoshi Takanaka, Jimi Hendrix, and Eric Clapton. They, too, started from the stage of learning basic chords and honed their sound within the context of a band.
The guitar is known for being the instrument that most people start with, but also the instrument that most people give up on. Conversely, this means that many opportunities open up for those who overcome the initial hurdles. Once you can play barre chords without faltering, synchronize your rhythm with other parts using cutting techniques, and add expression to songs with scale-based phrases, you'll become an indispensable member of many bands. From the goal of "being able to play" to the goal of "being able to make it sound." When you're ready to take that first step, try searching for bands looking for guitarists on Membo . If you have any problems, be sure to check out Membo's help page , Membo user guide , app usage page , Membo announcements page , and author information page.
- Search across 10 or more Japanese websites at once
- Automatic translation into 5 languages
- Coverage for all 47 prefectures
- Free to use